Category: Guides, Tutorials & How To

  • NCDU – Find what’s using all your disk space on linux based system

    NCDU – Find what’s using all your disk space on linux based system

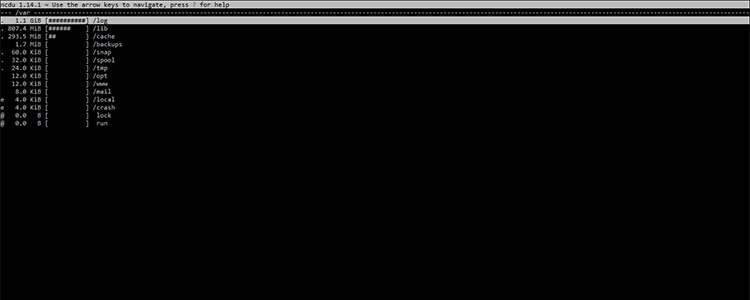
    NCDU is a text-based user interface, it allows you to visually see how and where disk space is being used via an easy-to-use interface. Simple run the command in the current directory to see a directory tree of folders & files and their space usage.

    I use this tool mainly for analysing why a server is running out of disk space, determine the reason why and if it’s simply expanded the disk space or is there unused files / massive logs which can be purged.

    Install

    Run the required command for your linux OS version.

    sudo apt install ncdu

    sudo yum install ndcu

    How to use

    Simple navigate to a directory you want to check and run the command:

    ncdu

    If you want to scan the whole system go to the root directory:

    cd /
    ncdu

    You can also specify a directory if you don’t want to change directory:

    ncdu /home

    Windows Server / PC

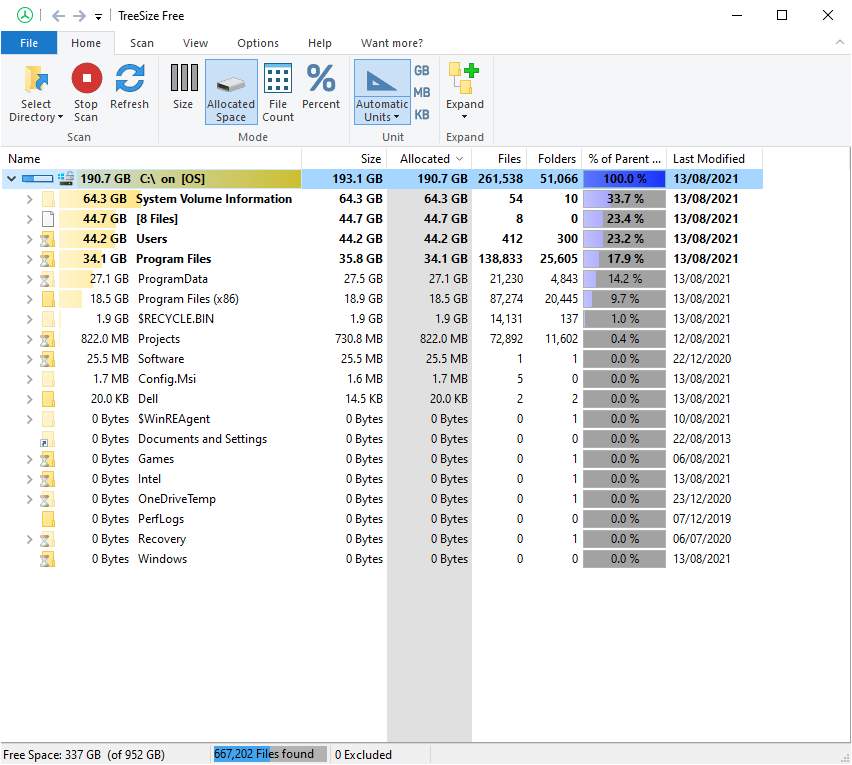
    For windows-based machines I use a bit of software called TreeSize, it does the same thing as NCDU, allowing you to see how your disk space is being used on a windows based OS.

    TreeSize on windows PC showing disk space usage
    TreeSize on windows PC showing disk space usage


    This is provided as it and may require changes to work for your needs.


  • Linux: Killall command

    It is your responsibility to ensure safe usage of these commands, improper usage could cause damage to services and file systems. We will not be held responsible.

    There is a number way of killing processes on a Linux based OS, killall is one of these methods. It’s always good to be ready to kill an unwanted process or a rogue process which is eating resources.

    Usage

    Kill all instances of the “httpd” process

    Kill all proccesses running under the user “postfix”

    Kill a specific process but its full path

    Command not found?

    It does not always come pre-installed, it’s simple to install.

    Ubuntu / Debian

    RHEL – Red hat / Fedora / CentOS

    This package also contains the following useful programs:

    • fuser – identifies what processes are using files.
    • killall – kills a process by its name, similar to a pkill Unices.
    • pstree – Shows currently running processes in a tree format.
    • peekfd – Peek at file descriptors of running processes.
  • Automatic MySQL database backups and zipping on windows with a bat file

    Automatic MySQL database backups and zipping on windows with a bat file

    It is important you double check your configuration before running this script! We cannot be held responsible for any damage this may cause.

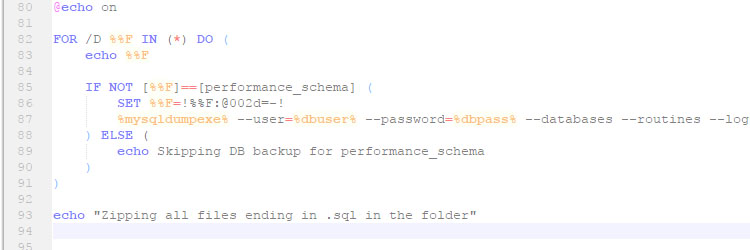
    Need to backup all your databases on a MySQL windows server? Red Olive have created a simple windows batch file to export all database tables and zip, including deleting older backups! It’s quite simple to setup look at their website.

    https://www.redolive.com/utah-web-designers-blog/automated-mysql-backup-for-windows/

    Their version is configured for a US date/time format, I am in the UK with UK based date/time formats, I have made a modified version of the script available below.

    You should setup a scheduled task to run the bat file on a regular interval, the more often you perform backups the easier it will be for you if there is a failure and you require to restore a backup.

    We also advise you look at a process for storing backups at remote location, if you backup to a Dropbox folder your backups will be uploaded to the cloud, protecting you if the server dies or has disk failure!

  • How to open a .Pages file using windows

    How to open a .Pages file using windows

    Today I was asked by a client how they open a .Pages files using a windows. Their computer didn’t recognise the file.

    What is a .PAGES file?

    A .PAGES file is an archive technology created by Apple for use on its Mac OS, it is very similar to .zip files. They are normally created when using iWorks a Mac OS program similar to Microsoft Office, Mac users can share there documents however it defaults to using a .PAGES archive format which is only supported on Mac devices.

    How to open it?

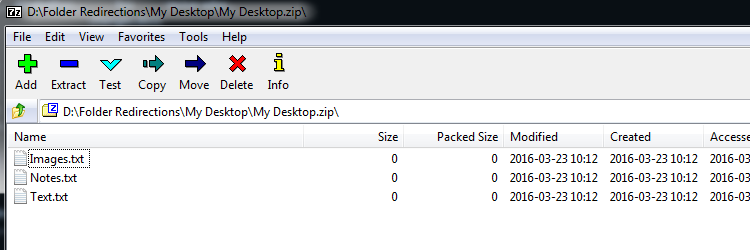
    It’s actually quite simple, just rename the file and change the .Pages extension to .zip and you can open it as a normal zip archive.

    • Right click file and select Rename
    • Replace .pages with .zip
    • Click yes when it popups up with “Are you sure?”
    • You should now be able to open the file
  • Combine multiple files into one using Windows Command Prompt

    Combine multiple files into one using Windows Command Prompt

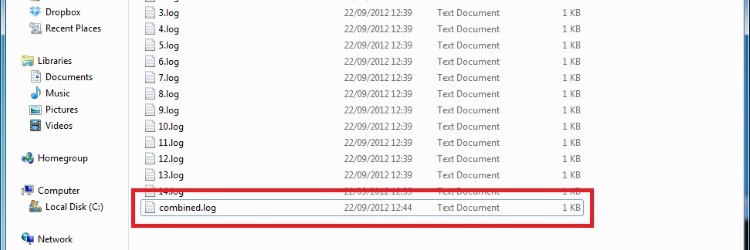
    Combine multiple files into a single file is very simple on Windows as long as the files you are wanting to combine are text (binary). Its not possible to merge multiple images, videos and other none binary related content using this method. Here is the Command Prompt (cmd) command we will be using to achieve this. (more…)

  • SEO: Finding commenatable blogs via Google

    SEO: Finding commenatable blogs via Google

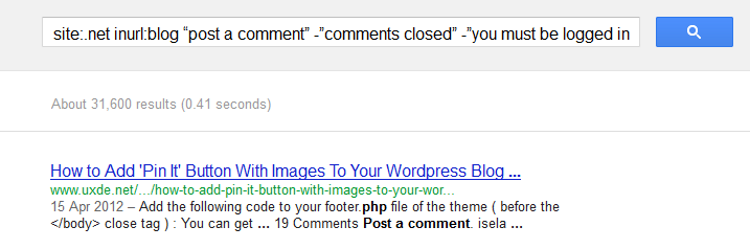
    Google is one of the biggest search engines with billions of pages, you enter in some keywords and it will find related pages. Google has some advanced search commands which allow you to refine your search results, I will be showing you how to refine your search results down to just blogs which you have the ability to leave a comment. (more…)

  • Pinning Eclipse to the taskbar with Windows 7

    Eclipse is a brilliant programming interface for many languages but when using a Windows 7 based PC you may have issues when pinning the shortcut to the task bar. As you can see below when I launch eclipse via the shortcut instead of using the pinned icon it creates a new one.

    If you right click the active icon you do not get a “Pin this program to taskbar” option like you would with other programs. Eclipse on the left and Microsoft Word on the right.

    All we need to do is add 2 simple lines to our Eclipse configuration file so that Java is detected correctly which then enables us to pin the application to the task bar. First we need to go to the directory where we have placed the Eclipse files, in my case this is “C:/Program Files/eclipse” but this will differ between everyone.

    If you can’t find the files try right clicking any shortcuts you have and select properties that will tell you where the actual files are.

    There is a file called “eclipse.ini” open it in Notepad it should look something like this.

    Add the following to the top of the file and save it. The second line needs to point to your Java installation bin directory; this may differ on your computer.

    You can normally find all the Java installations in the following location “C:\Program Files\Java\”, if you have a older or new version of java than me or using the JDK version then the name may differ from”jre7”.

    You can now start Eclipse and right click the icon on the task bar where you will now see the “Pin this program to taskbar” and when you open Eclipse it will no longer create a new icon.

    If you receive the following error when trying to start Eclipse then you have provided a invalid file location for Java. Try the other locations or in my case it was due to me pointing it to the 32bit version instead of the 64bit version (Program Files (x86) instead of Program Files).

  • OS Installation (Windows XP, Vista, 7….)

    Well its about time I writen the Windows installation proccess guide this guide will help you install most Microsoft windows operating systems as they all follow the same process, Vista and Windows 7 installation process is much cleaner and simpler to use as it has a step by step walkthrough but this guide will help you progress with your installation.

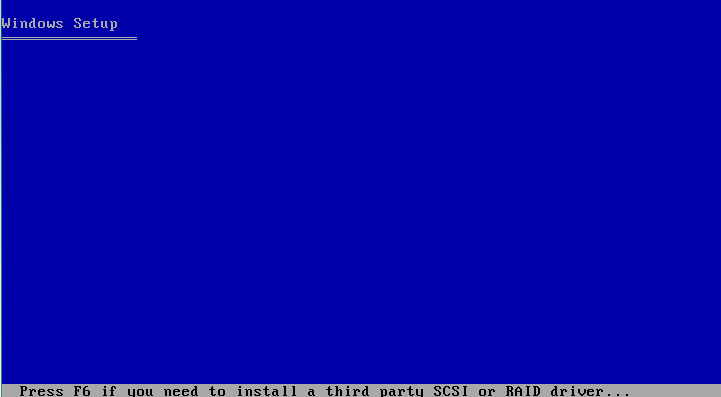
    When we first boot from the windows XP disk it needs to loads the files into the computer’s memory so that it can perform all the tasks it needs to do during the installation process, but before the installation we need to setup are hard drive so it’s ready to hold the operating system files and are data.

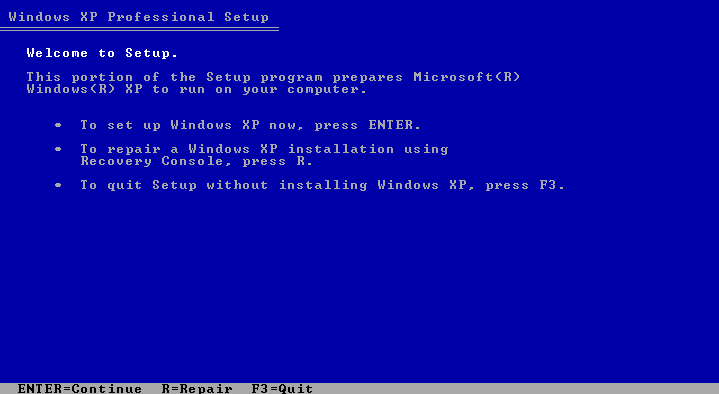
    Once the loading has completed you will have a selection of options to chose from, seeing as we are installing a new operating system we are just going to press the Enter key, if you ever had an issue with your installation you can also access the recovery console by pressing R but this is for users who known what they are doing and is not covered in this post.

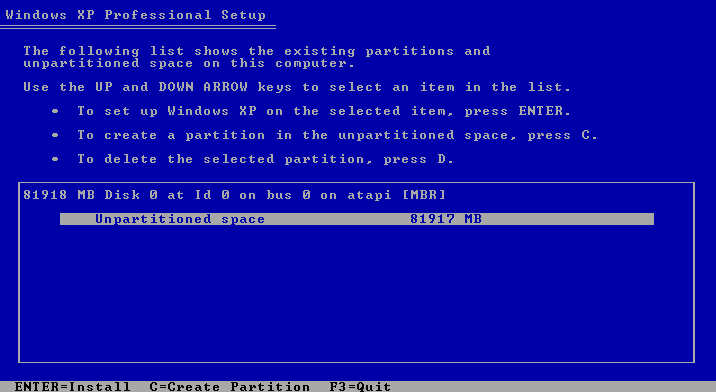
    Now we need to setup the partitions on the hard drive seeing as I am using a new hard drive I have no partitions and it just shows as unpartitioned space, I am going to create a partition using all the available space and install Windows on that partition so I’m just going to press Enter, you can do the same but please make sure you select the correct partition if you have multiple partitions (it will be the one which says Windows or something along those lines), you can create multiple partitions here if you wish by pressing C then entering how much space that partition will be allocated, pressing D will delete a partition and once you have created all your partitions select the one you wish to install Windows on and press Enter.

    A partition is a unique section on the hard drive which isn’t affected by other partitions, meaning if you install Windows on 1 partition and store all your files on another you can reinstall Windows and your other partitions and data will remain exactly how they were left (window shows each partition as a separate hard drive).

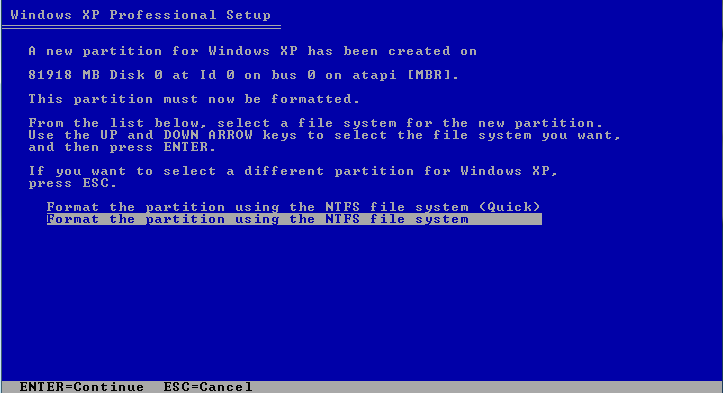
    The last question in this stage of installation is how you would like to format the partition which can either be done using a slow or fast formatting process, I generally use the slow method as it guarantees no errors or problems and make it harder to recover the old data. Using the quick method is allot quicker though and depends if you have the patience to wait.

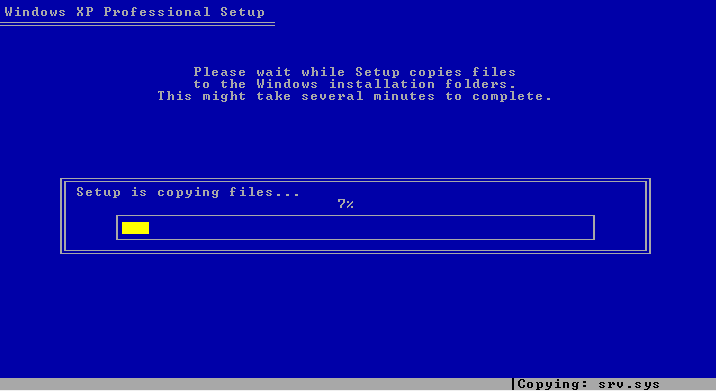
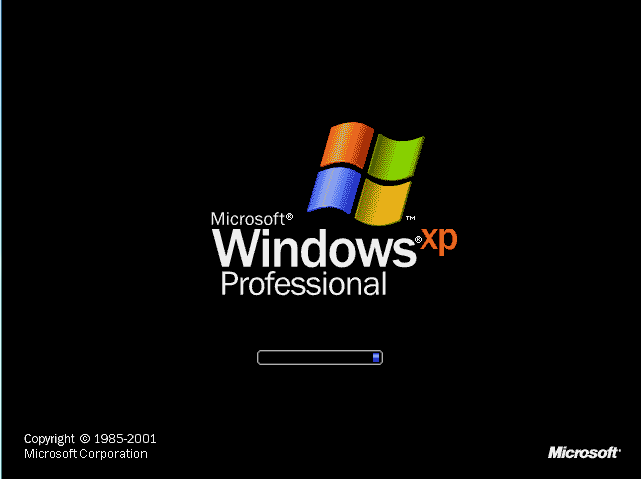
    It will now format the hard drive and then go straight on to the coping process which is moving all the installation files from the CD/DVD to the hard drive to help speed up the installation process. Once it has completed it will automatically restart the computer and the installation process will boot up.

    If you receive a screen like below this is correct and it will then go to the installation process.

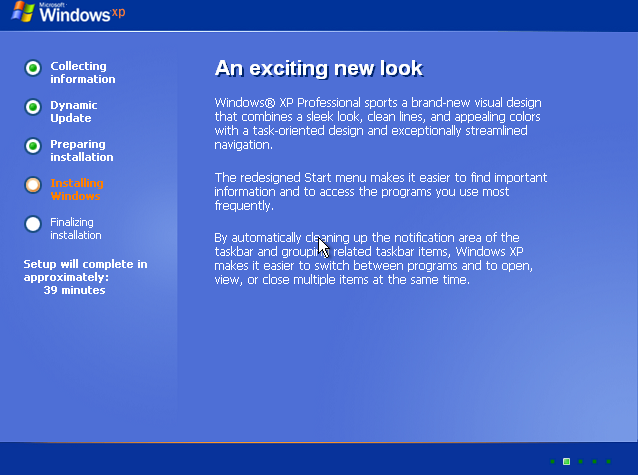
    The installation will go through numerous steps installing all the main system files and drivers and you will be prompted 2 or 3 times through the installation process, you can leave it installing and just return every now and again to see if it’s waiting for your response.

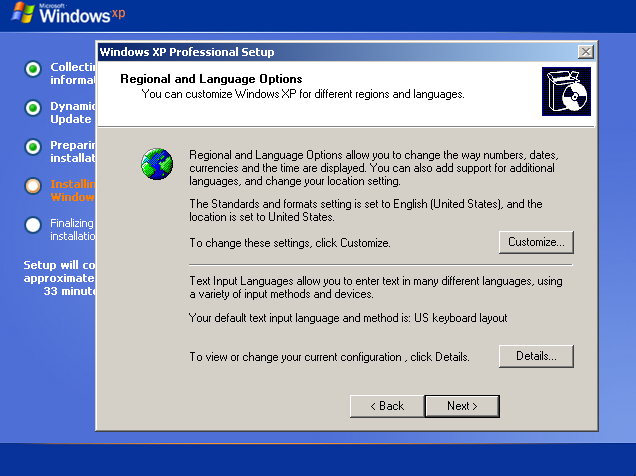
    The screenshot below is the first prompt you will receive and all you have to do is specify the language and keyboard layout. Without specifying your correct keyboard layout some of your keys may not work I life in United Kingdom and the default for Windows is United States, if I was to leave it some of my symbol keys would output incorrect symbols for my keyboard.

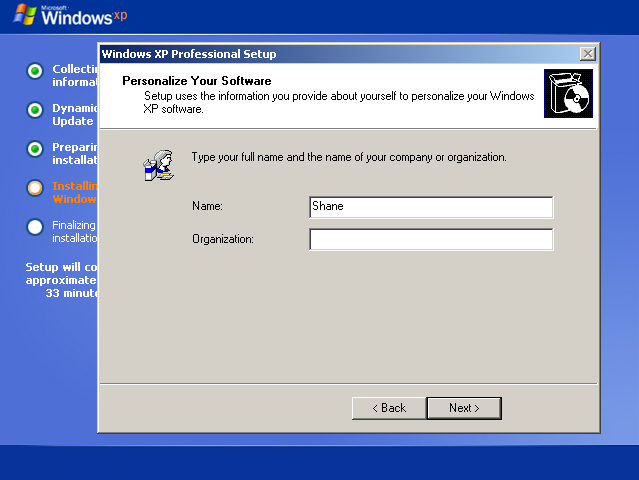
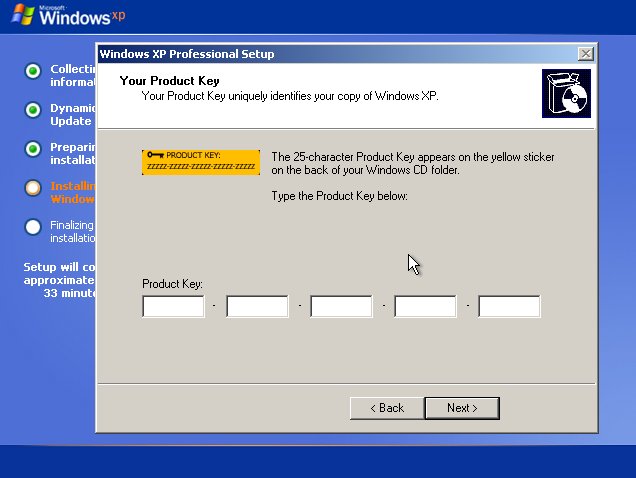
    Your next prompt is to enter the name of the system administrator (owner) and the CD key for installation. This process will not activate your CD key but a valid CD key must be provided.

    Your CD key can be found in many locations if you purchased your computer with the operating system already pre-installed your CD key will be located on a sticker on the side or back of the computer case, if it’s a laptop it is normally on the bottom of the laptop and if it’s from a shop it will be found inside the box.

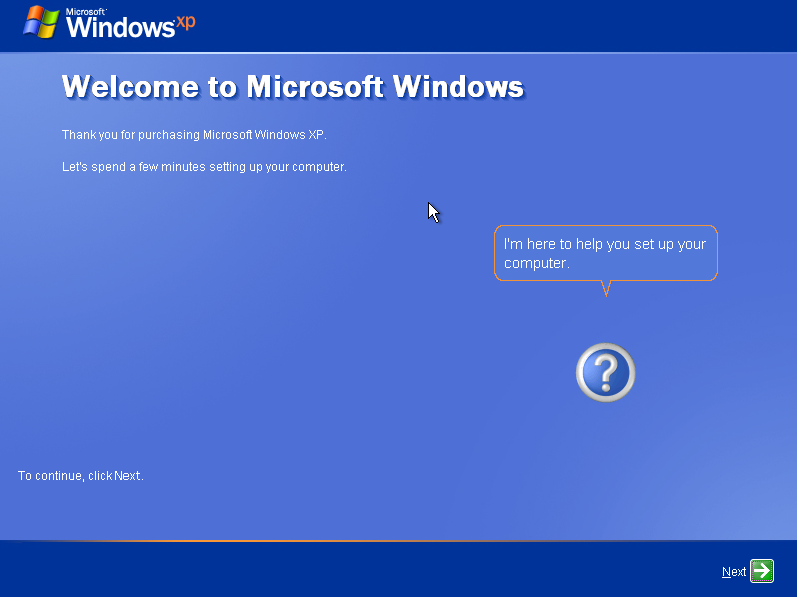
    You will receive a couple of other prompts such as selecting a name for the computer (can be anything) and network settings (normally just select Typical Settings). Once the installation is complete it will automatically restart again and this time boot into your Windows operating system. Your installation is now complete and all you need to do is complete the wizard which will load after completion your desktop will show.

  • Apache and PHP compression (gzip/deflate encoding)

    With internet speeds increasing and the users expecting fast and more responsive websites the technology we use has to adjust to these changes, when a user requests a website from a web server the server replies with the website content let’s say the website is my blog, last time I checked it was around 53,929 bytes for the home page which means the users web browser needs to download all 53,929 bytes before the website will display, only if there was a way to decrease the website size decreasing the download time for my visitors (giving them a faster loading website)….well there is.

    A website can be compressed lowering the total bytes required to be downloaded by the visitor which also lowers the bandwidth usage for both the client and web server sending the content, for example my blogs homepage is around 53,929 bytes uncompressed as soon as I enable compression it goes to 9,437 bytes which is a dramatic decrease (82.5% decrease) allowing my visitors to now load my blog quicker and lower the bandwidth consumption, the only side effect really is a slight increase in CPU usage on the web server as it now has to compress the content every time there is a request (pages can be caches as static html files to increase speeds and decrease stress on the server but this is not going to be covered in this post), the only requirement on the visitors side is that the web browser they are using supports compressed content as it will need to uncompress the content to be able to view the website (all modern browsers support this feature so it shouldn’t be a problem, most server compression methods can tell if the browser doesn’t support compression and will send the data normally if no support is found). There are two methods of compression which I am going to go through today which is apaches deflate module (usually provided with a default installation of apache, some shared hosts may uninstall this module so you will not be able to use the apache method) and PHP compression, it is best to use the apache method if possible but if not the alternative will do fine.

    Verifying Compression
    Verifying that are website is being compressed is important there is no point doing all the changes to find out a couple of months later you did it wrong and it hasn’t been compressing anything, there are multiple methods of determining if your website is being compressed the easiest is to use a website such as http://www.gidnetwork.com/tools/gzip-test.php which allows you to quickly and easy check and also see some estimated compression results, the alternative is to view the header data send from the web server this is achieved differently in most browsers but with Firefox you can use a add-on called Live HTTP Headers to view the header data (you’re looking for a line which says Content-encoding: gzip).

    Compressing Media
    Most media is already stored in a compress format such as images, music and archived files and so will not benefit from any more compression (will just be a waste of CPU usage), its mainly text based files such as css, php, html and so on which will benefit from encryption.

    Apache Compression (deflate)
    Enabling apache deflate compression requires access to a file called .htaccess which is located in the base web directory normally public_html, this file allows us to adjust server side apache settings without needing access to the main apache configuration file (we can customize are setup for multiple websites using this file). To compress your whole website simply place the code below into your .htaccess file.

    This will now compress your whole website and all the content including css, html, javascript and php content, images are not usually compressed due to them already being stored in a compressed format, if the following code didn’t work you may not be able to adjust settings using the .htaccess file or mod_deflate is not installed on the web server (you will have to use the PHP method further in this post or ask your hosting provider for help). Not everyone wants to compress all their content so you can specify the exact content to compress by using AddOutputFilterByType.

    This code will now compress only HTML and CSS pages all other content javascript, xml files and such are sent uncompressed make sure to remove SetOutputFilter DEFLATE as that line will cause all content to be compressed, you have specify the MIME data types which can be found here. It’s possible to compress files by extension using the code below.

    This code will compress all files with the extension .html, the same code can be used to compress a specific file by changing *.html to the file name so for example if I want to compress only test.html I would use the code below.

    It’s possible to adjust the compression level by simply adding DeflateCompressionLevel.

    This line of code can range from 1 to 9, 9 being the best compression method. By default 9 is used and there is rarely any reason to specify a compression level unless your CPU usage is high due to high website usage.

    PHP Compression
    It is highly recommended to use apache compression but if your unable to or unwilling its very simple to compress content using PHP, all that is required is to add the following code to the top of any PHP file needing compressed.

    What this does it check if the browser requesting the website supports compression, if it does it compresses the data if not it just sends the content normally (uncompressed). This method will only compress content loaded into the PHP file so if we have a test.html page this page will not be compressed as PHP never loaded it.

    Extra Reading
    http://betterexplained.com/articles/how-to-optimize-your-site-with-gzip-compression/
    http://www.samaxes.com/2008/04/htaccess-gzip-and-cache-your-site-for-faster-loading-and-bandwidth-saving/
    http://www.g-loaded.eu/2008/05/10/use-mod_deflate-to-compress-web-content-delivered-by-apache/
  • Whats linux and why use it?

    There are a variety of operating systems available but most users don’t know this and believe Microsoft Windows is the only one but there are hundreds available. It quite easy to understand why most people believe there is only Windows due to the way it is forced upon us (you buy a new computer it’s there). The price ranges for operating systems various tremendously starting from absolutely free to thousands of pounds, most are slight variants of another operating system.

    There are hundreds available but most average computer users will only come across Windows and Mac OS, most people will stay away from the others because there scared or don’t want to venture into the unknown, the internet doesn’t help especially when people can post anything putting people off. There’s also the history behind some of the other OS’s such as Linux, if I was to speak to one of my IT friends at work and mention Linux they would immediately start telling me how hard it is to manage and use, if I was to mention Linux to a friend who knew other operating systems existed he would automatically presume I was a computer geek. I think it is this kind of thinking which puts people off from even trying these great operating systems, especially when the internet is full of people pushing them into the dirt. Linux operating systems have come a long way since they first started and most Linux distributions such as Ubuntu are just as easy to use as a Windows operating system, Ubuntu even allows you to incorporate your social networking into your OS so you can get all your latest tweets and notifications alerts straight on your desktop. A majority of the internet’s websites and services are hosted on servers using a Linux operating system, Windows operating systems have been increasing in popularity due to the developments of VB.Net programming languages.

    Why would I even look into Linux?
    Linux is a very powerful operating system which can be used for a variety of uses such as commercial and non-commercial, enterprise users, power users and home users. There is no restriction to the use of Linux and most Linux distributions are free allowing you to just install and use (Windows and Mac OS require you to purchase a CD key). There are hundreds of Linux distributions available for example Ubuntu, Cent OS, OpenSuse, Gentoo, Slackware and Fedora this is just a small sample there are allot more. If you want to give them a try but don’t want to commit to a new operating system you can download the Live CD versions which most Linux distributions provide, this live CD allows you to boot into the Linux operating system experiment without actually installing it (Windows doesn’t provide this and requires you to install to test).

    Getting the operating system is one thing but what about the software we are going to use, well Linux comes with hundreds of free software such as OpenOffice (Microsoft Office replacement), any software made for windows will not work on Linux without the usage of a emulator (tricks the program into thinking its running on windows) or virtualisation platform (runs an operating system inside the Linux one, read this post for more information) but there are hundreds of free alternative software or some software providers also make a Linux compatible version.

    Security is always the issue with computers especially with Windows operating systems, Windows is the most used operating system so most computer threats are targeted at that operating system, this means there is much less threats targeting Linux operating systems (there are still some threats but Linux has a unique protection system). Windows when infected by a hacker or virus can be destroyed quite easily as the viruses has access to everything, on a Linux system the internal security is much stricter and only users with a specific access level can access specific files, for example a normal user can access all their own files but they can’t install, uninstall or access any file outside of their home directory, if a action is needed which requires a higher access level the user is prompted to enter their password, what this means is that even if a user did download a virus it would only have the same access as the user who downloaded it, when it tried to gain high level access the user will be alerted.

    The possibilities of Linux are endless and I would recommend that everyone at least tries it is free after all and comes with hundreds of free software. It won’t hurt to just download the live CD and play around on it for an hour or two you never know you might like it.