Virtualisation is used to run multiple operating systems on a single computer, if you want to know more about virtual machines (vm), virtual private servers (vps) then please read this post. In this guide I will be teaching you how to install, setup and start a virtual machine using some software called VirtualBox, there is alternative software available but I have chosen this one due to its ability to run on most operating systems such as Windows, Linux and it’s free. First thing we need to do is download the software, I am using a windows operating system as my master OS (operating system) so will be downloading the windows version of VirtualBox, please download and install the version required by your master operating system.
Download and installation of VirtualBox using windows operating system
Download and installation of VirtualBox using Linux operating system
Creating a virtual machine
Running virtual machine for the first time
VirtualBox extra features
[intro-text size=”25px”]Download and installation of VirtualBox using windows operating system[/intro-text]
First we need to download the correct copy of VirtualBox for are windows operating system, the download links can be found here, the exact file I am downloading is here. Download this file to a easy to react location such as the desktop, once it is downloaded perform a virus check to be save and then double click the file to begin to installation process. You may be presented with a security warning window like the one below, this is normal and it is save to click the Run button.

You will now be presented with the first installation window, click the next button and you will be presented with a window like the one below, with this window you can select the exact features you want to install, most users are fine with the default settings and I am going to leave it as the default as well.

For VirtualBox to function correctly it needs to install some system drivers allowing your virtual machines to connect to the internet or network connection. If you do not install these you will have no network abilities on your virtual machines.

Because a system driver is being installed windows security features will alert you and ask for conformation before allowing these new drivers to be installed, this is normal and would normally look like the window below. This kind of window will appear numerous times during the installation process and all you have to do is click the Install button.

VirtualBox is now successfully installed on your system, you can choose to launch the application once you click the Finish button or you launch the application manually.

[divider type=”thick”]
[intro-text size=”25px”]Download and installation of VirtualBox using Linux operating system[/intro-text]
First we need to download the correct copy of VirtualBox for are windows operating system, the download links can be found here, you will need to download the correct version for your Linux distro. Download this file to an easy to react location such as the desktop, once it is downloaded you can double click the file and it should go to the installation software used by that version of Linux, I’m using Ubuntu so will demonstrate the process using this operating system. You may also launch the file from your browser if you are given the choice like below.

This will speed up the process of installation as you won’t have to find the file after downloading it, doing it this way will download the file and automatically launch the installation software. Now on Ubuntu the software package used is called Ubuntu Software Centre, here is a screenshot of the interface which loaded after I double clicked on the file.

All we need to do is click on the Install button and the installation progress will begin, you may be prompted similar to the image below to authenticate and this is normal. You would normally enter the password you used to logon to your account.

The installation will now begin on successfully entry of the correct password. Once installed the software can be launched by locating it in the menu system.

[divider type=”thick”]
[intro-text size=”25px”]Creating a virtual machine[/intro-text]
The same process is used in all versions of VirtualBox to create a virtual machine, to start we have to start up VirtualBox which will present us with this window. The next step is to click on the New button located at the top on the left side.

A new window appears introducing us to the new virtual machine wizard, we continue by clicking the Next button and we will be presented with this screen. This screen allows us to specify a name which allows us to identify are virtual machines, we also select the operating system which will be installed on this virtual machine, I’m not sure why you specify these but I think it’s so the virtualisation software can adjust settings to increase running stability for specific operating systems.

We are now presented with memory/ram allocation, here we specify how much memory this virtual machine is allowed to use, you can only specify up to the amount available on the master computer and remember this memory is shared, so if we specify 512MB, that’s 512MB which now can’t be used by the master computer or any other slaves. It really depends on the operating system you are planning on installing which will determine what value to enter, I’m install Windows XP so setting this to 512MB.

The next and final steps are to create or assign a hard drive to the virtual machine, as we are creating are first virtual machine you will probably need to create a new hard disk. If you have a existing hard drive you can specify the location and that will be used.

There are two types of hard drives types which can be used, you can either choose from dynamically expanding storage which will only use up disk space on the master as the slave fills the hard drive, fixed-size storage does the opposite and will use up the space instantly on the master even if the slave hasn’t even used 50% of it. I’m going to use dynamically expanding storage.

Now that we have picked the hard drive type all we need to do is set the size which will be shown to the virtual operating system and a unique name. If you have picked fixed-size storage the size specified here will instantly be taken on the master computer.

Congratulations are new virtual machine is setup and ready to be started for the first time.

[divider type=”thick”]
[intro-text size=”25px”]Running virtual machine for the first time[/intro-text]
Starting the virtual machine is a very simple step, first you must select the virtual machine you wish to start from the list of virtual machines. I only have one virtual machine which I called Windows XP. Once you have selected the vm you want to start you can either double click it or click on the Start button located at the top with an arrow icon.
When you vm first starts you will be presented with a confirmation box all this is telling you is that when you click on your vm it will capture the keyboard inputs and forward them to the vm, meaning to input data to the host OS you will need to press your host key to swap between host OS and slave OS, by default this key is Right Ctrl.

You should now be presented with a first run wizard who will help us get a bootable CD or CD image loaded so we can begin installation of an operating system. Continue through the wizard until you reach the “Select Installation Media” window. This is where we tell the vm where we will be booting from, if you’re planning on installing an operating system from a CD then insert the CD into one of the CD drivers on the host computer and select the drive from the drop down list. If you’re going to be installing from a CD image located on the host machine which is what I am doing then you need to click on the icon next to the drop down list which looks like a folder with a green arrow on it.

Your now presented with a browse window, all you have to do is browse to the location of your image, select it and click open.

Once the image has loaded it should automatically return you to the select installation media window, notice the drop down list has now changed and shows the image you just selected. Click next when ready and the vm should begin booting from the media.

You may be presented with more confirmation boxes like the one below, read through it and continue with the rest of this guide. These messages are appearing because the vm is set to use a higher bit colour than what the operating system installation process is set to use, this issue will stop occurring once the installation of the operating system has been completed.

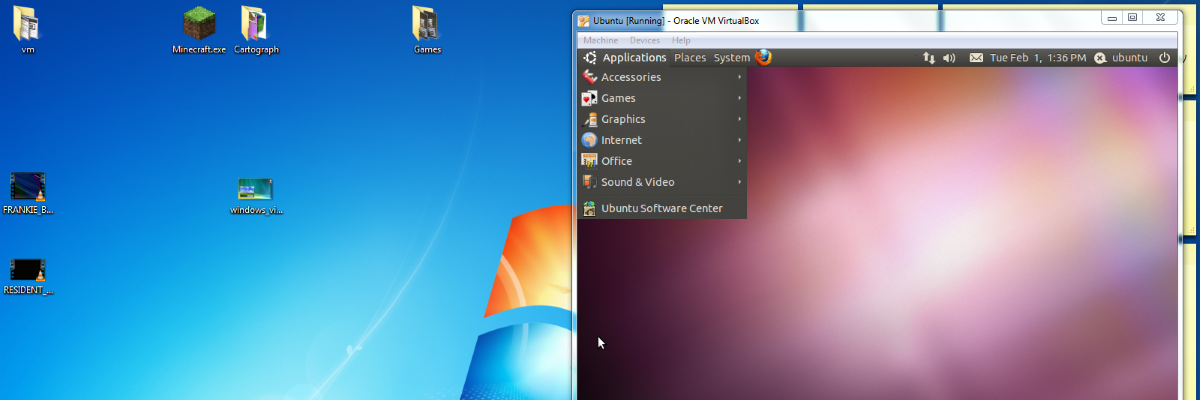
You now have to continue the installation of the operating system just like you would with a normal operating system installation; here is a simple guide for installing an operating system. Below is an image of my computer running Windows 7 and a vm running Ubuntu.

[divider type=”thick”]
[intro-text size=”25px”]VirtualBox extra features[/intro-text]
There are some extra features which I thought I would also tell you about, in the settings section of VirtualBox you can enable and change settings for individual VMs. To get to the settings window for a virtual machine you must select the virtual machine first then click on Settings located at the top on the left. You will be presented with a window like so.

Memory, Processor and Boot order
Adjusting the memory, boot order and processor settings can be achieved by going into the System tab, the tabs are located down the left side of the window. You can only edit some options whilst the virtual machine is running so I suggest you turn it off before trying to modify any settings. To increase the memory you simple increase or decrease the slider. The boot order is changed by lowering or increasing each bootable device and to stop a bootable drive from working you simply uptick it.

Processors
You can adjust the processor core usage which most people don’t know about, when you first create a vm its default cores is set to 1, it will allow you to select up to 8 cores but do not go above the green section of the bar. Going above the green section is bad since those cores don’t exist and will probably cause allot of instability problems.

Display
The graphics for a virtual machine can be adjusted including increasing video memory, monitor count and allowing the virtual machine to access the graphic card of the master system. A new feature in VirtualBox is the ability to allow the vm to access the master computer graphic card allowing 3D applications such as games to be played. You are required to install Guest Additions on the slave OS to enable these features.

Storage
Its possible to add multiple hard drives to a virtualbox there are many reasons why you want to do this, i my self done this when one of my virtual machines gained a virus, a added the hard drive of the machine to another virtual machine so that it could be read and scanned by the other operating system. To add a new drive you simply click on the cd which has a green plus sign and follow the wizard just like you did when you created your vm.

Network
You can specify multiple network adapters to a single virtual machine, you also have the ability to specify the exact IP address and other details related to IP address which this virtual machine will use, this is a good feature for people who need the virtual machine to always use the same IP address due to them possibly using a web server. In this section you can also specify how the adapter gets a internet connection, by default it connects to the internal network on the master computer, you can adjust the settings so that the virtual machine can access a network device such as a wireless card directly.

Guest Additions
The installation of guest additions allows a virtual machine to use advanced features such as accessing the master computers graphic card, with the installation of guest additions is the ability to add shared folders between the master and slave operating systems allowing you to transfer files to and from both operating systems. The latest feature added to guest additions is the ability to allow a virtual machine to access the master computers graphic card allows 3D applications on the slave. To start the installation of guest additions you simply need to click on Devices then Install Guest Additions, this will load a CD image into the virtual machine containing the files for both windows and Linux operating systems.

Now that the image has been loaded into the virtual machine its simple to install, on a windows operating system it would normally start the installation process or display a prompt asking what asking to perform, the media will appear as a CD drive and all you have to do is open the drive and double click on the Exe file, on a Linux operating system you need to double click on VBoxLinuxAdditions.run and then click on the run option.

Now if it complains that you need administration or root permissions then you will have to do the following steps, first you need to start Terminal which can normally be found with the other applications, on Ubuntu it is found in Applications > Accessories.

It should now launch a black screen with some text in it, now we are going to browse to the location of the CD which contains the file we need to install. You can do this simply by typing
|
1 |
cd /media/VBOXADDITIONS_4.0.2_69518 |
then press the enter key, if it cannot find the location then you simply need to enter
|
1 |
cd /media |
then type dir which will display all files and folders in this directory, then simply find the one which starts with VBOXADDITIONS and simple type cd then the whole name of the folder, so if the folder was called VBOXADDITIONS_1_2_3_4 we would type
|
1 |
cd VBOXADDITIONS_1_2_3_4 |

The next step is to start the installtion which is achieved by typing
|
1 |
sudo sh VBoxLinuxAdditions.run |
You may be prompted to enter a password, this is the password for the user you are currently logged in as. The installation will now begin, if guest additions is already installed it will uninstall instead.
Leave a Reply